INSTALL ODOO 14 ON UBUNTU SERVER 20.04.1 (64 BIT)
1) Go to Database server.
2) Backup file pg_hba.conf before edit.
# sudo cp /etc/postgresql/12/main/pg_hba.conf
/etc/postgresql/12/main/pg_hba.conf.20210818
3) Edit file pg_hba.conf to allow Odoo
Application to access by user odoo.
# sudo vi /etc/postgresql/12/main/pg_hba.conf
host all odoo 172.26.24.145/32 trust
host all odoo 172.26.24.146/32 trust
4) Restart PostgreSQL Service
# sudo systemctl restart postgresql
5) Switch to account postgres.
# sudo su postgres
6) Create account odoo
# createuser --createdb --username postgres --no-createrole
--no-superuser --pwprompt odoo
7) Access to PSQL.
# psql
8) Grant Super User Permission to account
odoo
postgres=# ALTER USER odoo with SUPERUSER;
9) Exit from PSQL.
postgres=# \q
1) Install Ubuntu 20.04.1 on VMWare vSphere
6.5.
2) Create account odooadmin.
3) Shutdown VM.
4) SSH to ESX Server, go to VM Folder
5) Add below line in bottom of vmx file
vmxnet3.rev.30 = FALSE
6) Power on VM.
7) Update existing package
# sudo apt-get update
8) Upgrade kernel and package to latest
version
# sudo apt -y upgrade
1) Install Python Dependencies
# sudo apt-get install -y git python3 python3-pip
build-essential wget python3-dev python3-venv python3-wheel libxslt-dev libzip-dev
libldap2-dev libsasl2-dev python3-setuptools node-less libjpeg-dev gdebi
2) Install PIP Dependencies
# sudo apt-get install -y libpq-dev python-dev libxml2-dev
libxslt1-dev libldap2-dev libsasl2-dev libffi-dev
1) Create account odoo with password ‘odoo’
# sudo adduser -system -home=/home/odoo -group odoo
2) Download latest Odoo source code to
folder /odoo/odoo-server
# sudo apt-get install git
# sudo git clone https://www.github.com/odoo/odoo --depth 1 --branch 14.0
--single-branch /odoo/odoo-server
3) Install Odoo Requirement Packages
# sudo pip3 install -r /odoo/odoo-server/requirements.txt
If you get error ‘Attempting
uninstall: <package name>’
4) Install Other Required Packages
# sudo apt-get -y install nodejs npm
# sudo ln -s /usr/bin/nodejs /usr/bin/node
# sudo npm install -g rtlcss less less-plugin-clean-css
# sudo apt-get install -y node-less
5) Install Wkhtmltopdf
# sudo apt-get install -y xfonts-75dpi xfonts-base
# sudo wget https://github.com/wkhtmltopdf/packaging/releases/download/0.12.6-1/wkhtmltox_0.12.6-1.bionic_amd64.deb
# sudo dpkg -i wkhtmltox_0.12.6-1.bionic_amd64.deb
# sudo cp /usr/local/bin/wkhtmltoimage /usr/bin/wkhtmltoimage
# sudo cp /usr/local/bin/wkhtmltopdf /usr/bin/wkhtmltopdf
6) Create Odoo Log Directory
# sudo mkdir /var/log/odoo
# sudo chown odoo:odoo /var/log/odoo
7) Create Custom folder to store customized
modules
# sudo mkdir /odoo/odoo-server/custom
# sudo chown -R odoo:odoo /odoo/odoo-server/custom/
8) Change owner of folder /odoo to
odoo:odoo
# sudo chown -R odoo:odoo /odoo/*
1) Create file odoo-server.conf
# sudo vi /odoo/odoo-server/odoo.conf
2) Add content to odoo-server.conf (Change
info to match with your environment)
[options]
; This is the password that allows
database operations:
admin_passwd = admin
db_host = 172.26.24.143
db_port = 5432
db_user = odoo
db_password = odoo
addons_path = /odoo/odoo-server/addons,
/odoo/odoo-server/custom
xmlrpc_port = 8069
logfile =
/var/log/odoo/odoo-server.log
log_handler = ["[':INFO']"]
log_level = info

3) Change owner of odoo-server.conf to
odoo:odoo
# sudo chown odoo:odoo /odoo/odoo-server/odoo.conf
4) Change permission of odoo-server.conf
# sudo chmod 640 /odoo/odoo-server/odoo.conf
5) Configure firewall to allow port 8069
# sudo ufw allow 8069
6) Switch to user odoo
# sudo su - odoo -s /bin/bash
7) Go to odoo folder
# cd /odoo/odoo-server
8) Start Odoo service
# ./odoo-bin -c /etc/odoo-server.conf
9) At this point, Odoo service will run
foreground in your shell, if you press Ctrl+C or logout then Odoo service will
terminated.
1) Login by user odooadmin.
2) Create startup file.
# sudo vi /odoo/odoo-server/start.sh
3) Add content to startup file.
#!/bin/sh
sudo -u odoo /odoo/odoo-server/odoo-server
--config=/odoo/odoo-server/odoo-server.conf
4) Change owner of startup file
# sudo chown odoo:odoo /odoo/odoo-server/start.sh
5) Change permission of startup file
# sudo chmod 755 /odoo/odoo-server/start.sh
6) Create init file
# sudo vi /etc/init.d/odoo-server
7) Add content to startup file.
#!/bin/sh
### BEGIN INIT INFO
# Provides: odoo-server
# Required-Start: $remote_fs $syslog
# Required-Stop: $remote_fs $syslog
# Should-Start: $network
# Should-Stop: $network
# Default-Start: 2 3 4 5
# Default-Stop: 0 1 6
# Short-Description: Odoo Community Edition
# Description: ODOO Business Applications
### END INIT INFO
PATH=/sbin:/bin:/usr/sbin:/usr/bin:/usr/local/bin
DAEMON=/odoo/odoo-server/odoo-bin
NAME=odoo-server
DESC=odoo-server
# Specify the user name (Default: odoo).
USER=odoo
# Specify an alternate config file (Default: /etc/openerp-server.conf).
CONFIGFILE="/odoo/odoo-server/odoo.conf"
# pidfile
PIDFILE=/var/run/${NAME}.pid
# Additional options that are passed to the Daemon.
DAEMON_OPTS="-c $CONFIGFILE"
[ -x $DAEMON ] || exit 0
[ -f $CONFIGFILE ] || exit 0
checkpid() {
[ -f $PIDFILE ] || return 1
pid=`cat $PIDFILE`
[ -d /proc/$pid ] && return 0
return 1
}
case "${1}" in
start)
echo -n "Starting ${DESC}: "
start-stop-daemon --start --quiet --pidfile $PIDFILE --chuid $USER --background
--make-pidfile --exec $DAEMON -- $DAEMON_OPTS
echo "${NAME}."
;;
stop)
echo -n "Stopping ${DESC}: "
start-stop-daemon --stop --quiet --pidfile $PIDFILE –oknodo
echo "${NAME}."
;;
restart|force-reload)
echo -n "Restarting ${DESC}: "
start-stop-daemon --stop --quiet --pidfile $PIDFILE –oknodo
sleep 1
start-stop-daemon --start --quiet --pidfile $PIDFILE --chuid $USER --background
--make-pidfile --exec $DAEMON -- $DAEMON_OPTS
echo "${NAME}."
;;
*)
N=/etc/init.d/$NAME
echo "Usage: $NAME {start|stop|restart|force-reload}" >&2
exit 1
;;
esac
exit 0
8) Change owner of Init file
# sudo chown root: /etc/init.d/odoo-server
9) Change permission of Init file
# sudo chmod 755 /etc/init.d/odoo-server
10) Configure to auto start Odoo Service on
server startup
# sudo update-rc.d odoo-server defaults
1) Start service
# sudo systemctl start odoo-server
or
# sudo /etc/init.d/odoo-server start
2) Restart service
# sudo systemctl restart odoo-server
or
# sudo /etc/init.d/odoo-server restart
3) Stop service
# sudo systemctl stop odoo-server
or
# sudo /etc/init.d/odoo-server stop
1) Odoo log file location is defined in
configuration file at /var/log/odoo/odoo-server.log
2) Real-time monitor log
# sudo tail -f /var/log/odoo/odoo-server.log
1) Open browser (Chrome), browse to URL
http://172.26.24.145:8069
2) If this is the first time startup, you
will be asked to create the first Odoo instance and Database à Input information and click Create
database button.

3) Since creation completed you will see
webpage as below.
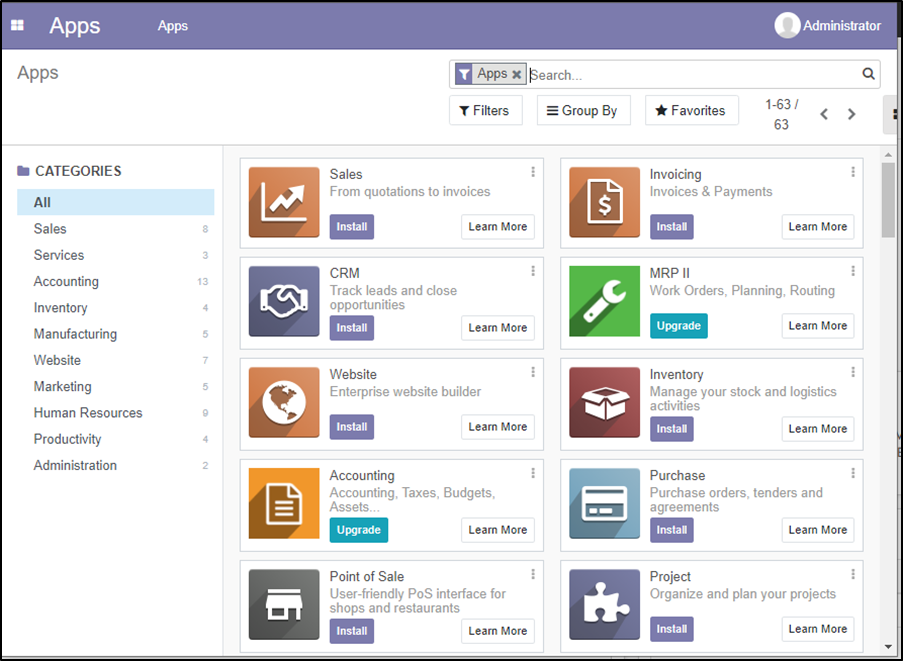
4) Find and install your first module is Employee.

5) If you are developer or administrator,
you will need to enable Developer Mode by go to Menu à Settings à Scroll down to bottom click on
‘Activate the developer mode’.

6) You’ve just finish to setup 1 Odoo Application. Repeat Step IV à Step X to setup another Application Server with same instance and database for load balancer.
7) Now Enjoy Odoo !!!
